Showing posts with label copics. Show all posts

Saturday, June 13, 2015

Another card.... what?!?!

I have another card to share for MarkerPop's Anything Goes challenge today:


I think this is my go to color combo lately.  Gorjuss doll was stamped multiple times and bits were colored with copics then layered to give her some dimension.  The patterned paper and sentiment are from Lawn Fawn.  The epoxy stars I found in my stash.

Thanks for stopping by!

Angie


Tuesday, June 2, 2015

OMG... I colored something!!

I had two baby showers in May so there was a lot of amazing gifts from loved ones and of course lots to put away.  Now that we got all of the goodies in their new homes, I wanted to do something with all of the cards that were given to us.  I have these 12x12 envelope pages that I thought would be great for saving the cards.  

I stashed the cards in the envelope then realized I couldn't let the front pocket/label unadorned.  I broke out the copics and had at it! Boy, it's been a while!  Here's what I came up with...


I kept it pretty simple since it as going into the front pocket, although I kept staring at some sequins and epoxy dots that I wanted to use ;)  And here it is in the envelope:


And since MarkerPop is having an Anything goes challenge, I thought I'd throw this into the challenge as well.

Have a great day!

Angie


Monday, October 20, 2014

Fall is in the Air with My Whimsical Little World

Today I'm sharing the newest release from My Whimsical Little World.  Great for the fall!

First up, a cute little pilgrim boy:


For this card, I colored the image with my Copics, masked it the colored the background with distress inks after die cutting it.  Before I peeled off the mask, I stamped on the sky to add a little texture.  Once my image circle was complete, I matted it on some autumn-y paper.  It was still missing something though.  I found the pumpkin puffy sticker in one of my recent Freckled Fawn kits and thought it was perfect for this guy.  I ruffled up some washi tape and added the sticker to finish it off.

Next up, something for all of the football fans out there...In the Air:


To be honest, I was a little stumped with the football digi at first.  I don't follow football at. all.  But we have a little game going on at work so I started brainstorming and landed on turning it into a Super Bowl invite.  I colored the football and cloud with my Copics again, masked it off and distress inked the background.  The center piece is matted on the base which is edged with washi tape (same tape, I used for the flower in the first card, just layered on top of itself to make the lines cross themselves).  I added embellishments out of my Freckled Fawn kits again.  Super happy with how this one turned out :D

So you've seen what I've done with these beauties, be sure to check out some of the other DT members to see their takes on the latest release.


After you've seen what these amazing ladies are up to, stop by the MWLW Facebook Page.  There's a sketch challenge going on through November 4th that you should definitely play along with!

Also You have until Tuesday night to play along with Inspiration Destination's Anything Goes Challenge for your chance to win two MWLW digistamps.  

Angie

SUPPLIES - 
PILGRIM BOY CARD:
WeR Memory Storytime 12x12 Paper
Brown Cardstock
Copic Xpress It Blending Card
Impression Obsession Criss Cross Background Stamp
Freckled Fawn October Kit
Lifestyle Craft Circle Dies
Distress Inks - Salty Ocean, Stormy Sky, Mowed Lawn
Ink Blending Tool
Copics - Skin: E51, E11, BV00; Hair: E97, E15, E18; Eyes: G24, G28; Socks: C1, C3; Clothes: C5, C7, C9; Pumpkins: YR65, YR68, YR16, YR18, YR12, YR14, Y28, G46

SUPER BOWL INVITE:
Copic Xpress It Blending Card
White card stock
Impression Obsession Criss Cross Background Stamp
Freckled Fawn October Kit
Distress Inks - Stormy Sky and Tumbled Glass
Copics - C00, C1, C3, E35, E37, E39

Monday, September 15, 2014

Penguin Plunder

Today is a new digi release for My Whimsical Little World Digi Stamps and the theme this time around.... animals.  Paola has created 6 adorable little images (4 animals and a companion background!) and I'm showcasing the three penguins today.

I decided to make a set of mini cards for this release.  I checked out my envelope punch board to see what card size I could make an envelope using a 6x6 sheet of paper.... 3.5".  So that's what I went with.  I think they'd be perfect to tuck into a gift or maybe someones lunch or backpack.

First up, is the adorable Penguino with hat and scarf.  I colored him with my copics then fussy cut him before putting him onto my card base and embellishing.


Next, we have a great little Pablo.  He's holding a cupcake, which would be great for birthdays or any other celebration, but I wanted to use these cute puffy stickers to say 'sweet hello' (you can make out the hello pretty well in the pic, but the sweet is a little faint )... very versatile.


For the third card in the set, I used Tooey and repeated the process (color with copics, fussy cut, put on card, embellish ;))


I also got to play with the cool igloo digi that's being released today.


I imported it into my Silhouette software and sized it to fit into a regular 4.5"x5.5" envelope. I used the trace function to create a shape slightly larger.  Then copied that shape, rotated it to fit along the top to create a folded card, and merged the two so they would cut as one shape (clear as mud?!)  This way the card base would have a slight outline to mat the great igloo on.  You can't see it in the picture, but the outline is covered with a glittery embossing powder for a 'snowy' effect.

So that's what I've come up with for this great release - can you see the penguins on some fun Christmas/Winter cards for this year??  Go check out a couple other design team members to see what great things they've come up with using the penguins and other animals being released.

Paola  
Melanie  

And did you know there is a My Whimsical Little World Facebook Page??  There's a challenge going on there until October 8th to play along with - you just have to create something using purple, orange, and green.


Thanks for stopping by!

Angie

SUPPLIES
STAMPS -  My Whimsical Littlw World Digistamps - Tooey, Igloo, Pablo, Penguino
PAPER - Copic Xpress It; Office Max White Cardstock; Basic Grey Aspen Frost
COPICS - C5, C7, C9, Y35, Y38, BG10, BG45, G40, G43, G46, W00, W3
MISC - Versamark ink, Stampin' Up! Irridescent Ice Embossing Powder, Walnut Stain Distress Ink, Mini Ink Blending Tool, WeR Memory Keepers Envelope Punch Board, Freckled Fawn Oh Deer Me Kits (July and August)


Friday, August 29, 2014

Cupcake Layering

Happy Labor Day weekend!  I thought I'd start off my long weekend by doing a little crafting so I'm sharing this little birthday tag I created using another up cycled counter sample and a Cupcake digi stamp from My Whimsical Little World.


I took the cute Cupcake digi and printed six copies on one sheet.  I knew I wanted to layer it so I colored in different parts on each image with my Copics, fussy cut them all, and layered them with little bits of foam tape.  I coated the flame with some glossy accents.  While that was drying, I grabbed my tile piece, added a strip of patterned paper that's cut with a curve (a scrap of some other project!).  Once the flame was dry, I placed it on my tile and added a little shading on the patterned paper with a grey Copic.  To finish it all off, I added a few pieces of bling, some ribbon, and some twine.

I'm playing along with a couple of challenges on this one - 

Thanks for stopping by!

Angie

SUPPLIES:
STAMP - MWLW Cupcake Digi
PAPER - Copic Xpress It, Basic Gray RSVP
COPICS - Wrapper: V12, V15, V17; Cake: E25, E27, E29; Layers: C00, C1, C3, R81, R83, R85, V04, V06, V09, V01, V12, V15; Candle: Y15, Y38, YR68, B02, B04, B06, C00, C1, C3; Under cake shading: C3
MISC - counter top sample, Stampin' Up! Pool Party Seam Binding; Queen & Co. Twinkle Goosebumps Clear; Purple Bakers Twine, Glossy Accents, Foam tap


Monday, August 18, 2014

Rocking Out with MWLW


Today's newest digis at My Whimsical Little World are music themed.  I visited a new to me creative reuse shop close by and picked up some supplies that inspired me while there.  So today I have two musical projects using some up cycled items!

For Cadence, I decided to take a couple of old CDs (I didn't pick these up at the reuse shop, but I saw them there and knew I had a stack of old ones from my hubby and thought they'd be perfect for this!) and turn them into a notebook:


I started by masking the word 'notes' with a few stickers and painting the entire CD black.  Then I removed the stickers to have the silver show through.  I colored Cadence with Copics and attached her to the front and spread some bling bubbles around here.  I painted a second CD to use as the back cover and covered both of the CDs with paper on the non painted sides.  I punched the CD using my Cinch binder and added some ribbons to the rings once it was filled with paper.

Another thing I picked up at the reuse store was this household sample (I'm not sure if it's flooring or countertop or what, but I always see them at hard ware stores and thing they'd be great for something!).  Since the sample already had a hole punched in it and nicely rounded corners, I decided to use the whole thing for a tag to spotlight Marcia:


I tried a new color combo for her skiing and love how she turned out :)  I used white embossing paste on the cassette stencil over the tag.  I love that the sample had the speckled background already so it wasn't just boring black.  I added the paper trim along the bottom and a piece of leather cording to add a sentiment (and cover up the brand name that was stamped there ;)).  I added some frosted bling around and finished it off by adding some seam binding tied with the same leather cording used on the front.

I hope you enjoyed my projects.  Be sure to stop by some of the other DT members and see what they've come up with as well - 

And visit us at the MWLW Facebook Page as well.

Thanks for stopping by!

Angie

SUPPLIES
CADENCE CD NOTEBOOK
Stamp - My Whimsical Little World Cadence Digistamp
Paper - Copic Xpress It
Copics - Hair: E13, E15, E19; Skin - E01, E21, E11; Pants - B95, B97, B99; Shirt - C1, C3, C5, BV20, BV23, BV25; Seat - C6, C8, C10; Headphones - C00, C1, C6, C8, C10; CD - V01, B00
Miscellaneous - old CDs, black acrylic paint, Thickers stickers; Queen & Co. Bubble Bling; ribbon from stash, Cinch binder and 0.75" rings, copy paper, Lifestyle Crafts Circle dies
DANCING MARCIA TAG
Stamp - My Whimisical Little World Dancing Marcia and Paper Smooches Sentiment Sampler
Paper - Copic Xpress It, Authentique Seasons Winter 
Copics - Hair - E97, E15, E18; Skin - E50, E51, E21, E11, E04; Eyes - B97, BG02, Skirt - B95, B97, B99; Shirt - C1, C3, C5; Undershirt, belt, and shoes - BV20, BV23, BV25
Miscellaneous - Household sample, white embossing paste, Crafters Workshop Cassette Tape stencil; Versamark, white embossing powder, postage stamp border punch, Queen & Co. purple frosted bling, ribbon and leather cording

Sunday, August 10, 2014

Summer fun

Just a quick share of a card I made with a little hula girl that is perfect for MarkerPop's Anything Goes challenge this week:


She's colored with Copics.  The scalloped frame behind her is cut from a seashell patterned fabric and the craft card base is embossed with a ribbon tied around it.  Pretty simple, but cute :)

Thanks for stopping by!

Angie


SUPPLIES - 
Paper: Copic Xpress It, Stampin' Up Crumb Cake, sticky back paper 
Stamp: Stampendous Hula Girl
Ink: Memento Tuxedo Black
Other: Copics (sorry, I don't have the list of what I used for this one); Spellbinders large scalloped rectangles; white seam binding ribbon; Lifestyle Crafts embossing folder; seashell fabric

Monday, July 14, 2014

Summer Friends at My Whimsical Little World

My Whimsical Little World is releasing some great summer digi stamps today.  There's three in total - Kody, Phoebe, and Marigold.  I made a set of cards using the characters, so let's jump right in!

First up.... Surfer Kody:


Followed by Phoebe:

And lastly, Marigold:


I colored the hair and skin of all three with Copics  - I wanted to try different color combos for each of them, by the time I colored Kody and Phoebe looking rather tan, I remembered some of us are 'blessed' with pale skin that burns rather easily, so I used a paler, pinker tone for Marigold. :D  After that, I grabbed a Basic Grey paper pad and paper pieced the rest of them.

Some of the digis come with their own background (like Phoebe - the shell and flower in the sand are part of her background!) which is great for coloring, but I like to add layers so I stamped a cloud background, watercolored some paper with distress ink for the waves and used this great sand-like embossing powder for the sand.

And I can't forget the insides :)  I printed the digis at a smaller size and adjusted the color to match the teal of the card stock that I was using, added some scraps of patterned paper and I end up with a cute set of cards.


Now you've seen what I came up with using these awesome digistamps, have a look at what some others have created:

Be sure to stop by to see the full release post by Paola at My Whimsical Little World and stop by the Facebook page for more updates.

Thanks for stopping by!

Angie

SUPPLIES - 
PAPER: Copic Xpress It blending card stock, Stampin' Up! Pool Party and Island Indigo, Basic Grey Persimmon 6x6 paper pad, white card stock, watercolor paper
STAMPS: Paper Smooches Good Gab and Sentiment Sampler; Impression Obsession Clouds and Wavy Lines
INK: Memeto Tuxedo Black and Summer Sky, Stampin' Up! Pool Party, Distress Inks - Salty Ocean, Evergreen Bough, and Chipped Sapphire
MISC: Stampin' Up! Oval and Scalloped Oval Punches, Stampendous Golden Sand Embossing Powder, Glossy Accents
COPICS:
   SKIN - E11, E15, E17; HAIR - YR24, YR27, E35, E37; EYES - G43, G21, G46; SHADING - B39, G99, C2, C0
    SKIN - R000, R00, R01, RV29; HAIR - E13, E17, E18, E19; CLOTHES - BG72, BG75; SHOES - C6, C8, C10; EYES - E27, E29, E49
    SKIN - YR0000, YR000, YR00, E11, E04, E08; HAIR - YR24, E51, E53, E55; GLASS - BG000, Y13 FRV1; GLASSES - W2, W4, W6, YR18; SHELL - E501, E51, E53


Sunday, June 29, 2014

More Glitter :D

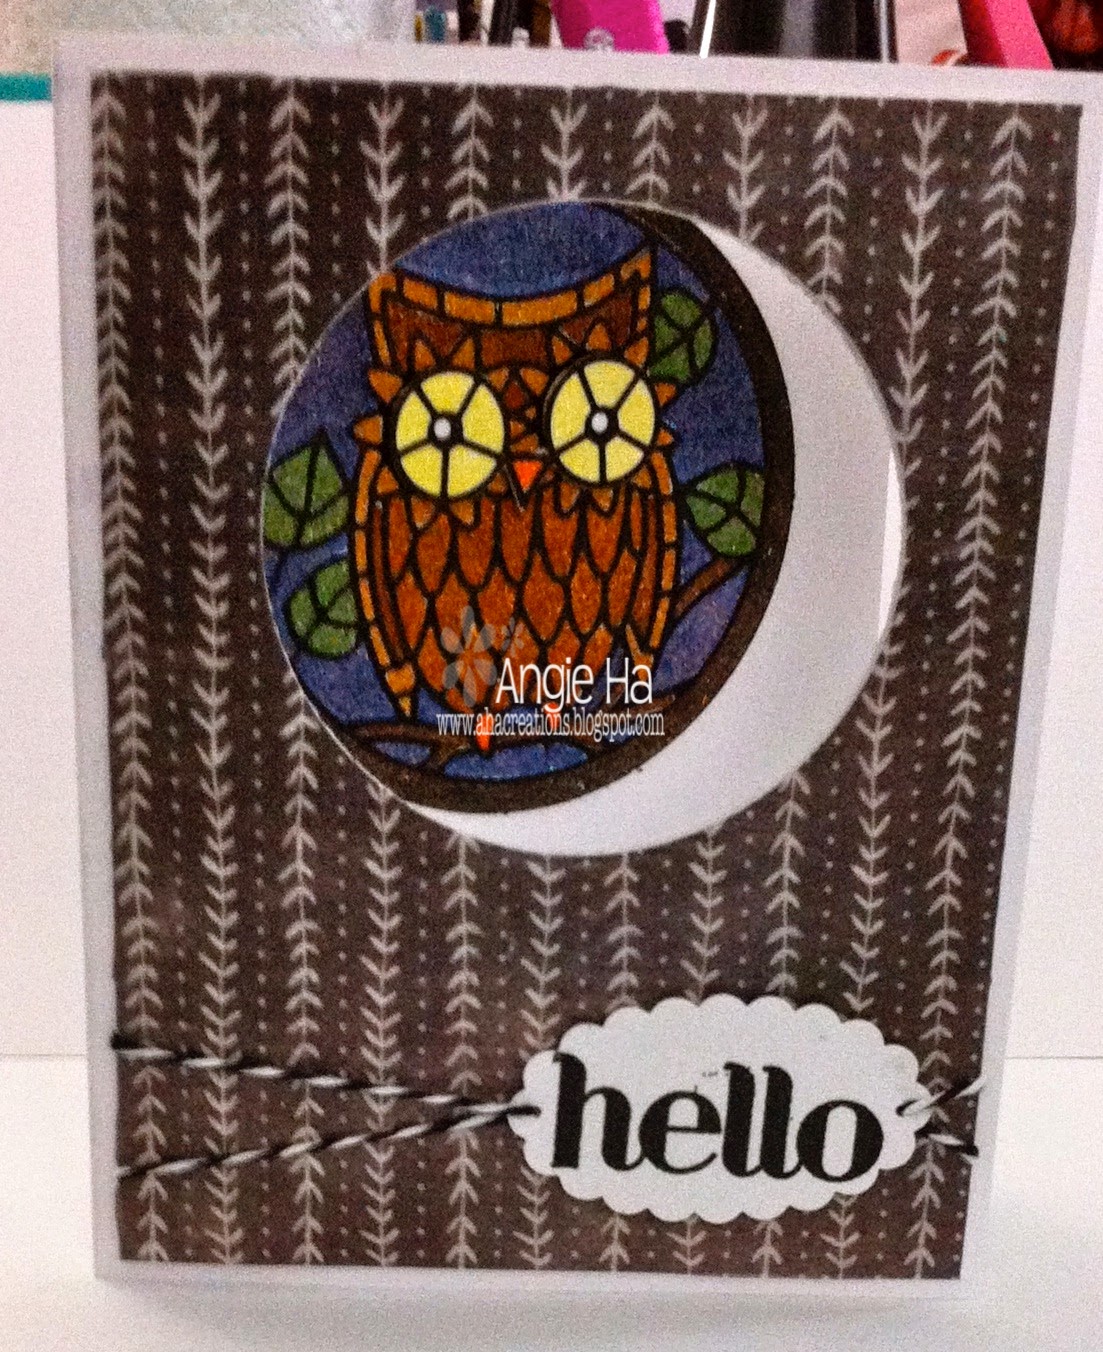
I'm playing with glitter and outline stickers again :)  I got these cute Owl Circle outline stickers and came up with this little card...


I colored with Copics on the glitter and popped it on the inside of the card after creating a window on the front.  The pattern on the from is a washi sheet so it adds a slightly different texture to the front.  Here you can see that the owl is on the inside:


And lastly, a quick close up of the glittery goodness!


Thanks for stopping by!

Angie

SUPPLIES
Elizabeth Crafts Owl Circles
Copics
foam tape
White card stock
Stampin' Up! scalloped circle punch
black and white twine
WeR Memory Keepers Washi sheets
1/16" hole punch
Stampin' Up! Four You


Saturday, June 21, 2014

Summer is here

I had only a few things planned for today - do some laundry, pack a trip, and pick up hubby at the airport.  Laundry was a breeze since it's only been me around the house the last week.  Packing got done.  And hubby's  flight has been delayed (possibly until tomorrow!) so I had some time to kill and what better way to do it than, play along again with Markerpop's Biweekly Challenge!


Since it's summer, I thought I'd do something along those lines.  I was looking through my stamps and found this great mermaid from Sweet November stamps and thought she was perfect.  So I inked her up and got to coloring.


Once she was colored and fussy cut, I found some papers, grabbed some distress inks and assembled my card.


Quite summery, don't you think??  And I couldn't let the inside go to waste.  I juster some of the strips I had cut off to make the front and added them to the inside.


Great way to kill some time!  Now what to do ;)

Thanks for stopping by!

Angie


SUPPLIES
COPICS: Skin - E00, E11, E13, E15, R20; Hair - YR21, E97, E99, E18; Fins - BV00, BV11, BV23, BV25; Eyes - BG15, BG57, BG09; Manatee - W3, W5, W7
Stampin' Up! Mini Brads and Fancy Label Punch
Quick Quotes Stowaway 6x6 paper pad
AmyR Summer Sentiments

Tuesday, May 13, 2014

My New Copic Swatch Book

Back in February, I shared my little disc bound coupon book that I came up with.  I really do love these notebooks and I've been frustrated with my Copic swatch book for some time now.  I haven't been creating much lately (wallpaper removal was kicking my butt!!) but I still wanted to color, so I decided it was the perfect time to redo my swatch book.

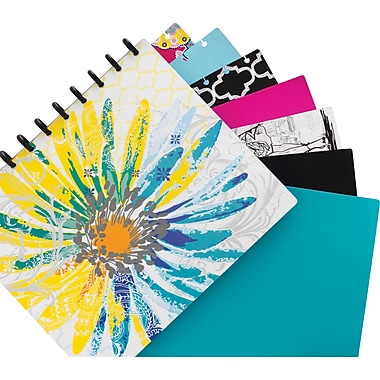
I stopped at Staples to grab some discs to create a new book, but when I got there, I found this notebook with a clear hard cover and interchangeable cover designs.  


Originally, I thought I'd use some decorated chipboard, but this worked even better!  I decided to make my own little cover and display it through the clear plastic.  I wasn't sure what to do with the covers it came with, but figured they'd be usable...eventually ;)

The first thing I did was pull things out of my old book.  I was using a portfolio that I grabbed at Michael's and realized I wasn't really using it since it was a nuisance to pull the pages in and out any time I wanted to add a swatch.  With the disc notebook, the pages are easily accessible and the extra pages easily fold back out of the way.  When I went to add my Copic color chart to the book, I noticed when I would punch the holes it would cut off the top row of colors so I headed back to the Copic website and printed a new one - I adjusted my print settings so there would be a little bit of a margin to allow for the hole punching.


 I added wash tape to the edge to reinforce the hole punching.

I had been using some circles that I printed from my computer for color combos, but wasn't 100% happy with them, so I did a search and found this great combo chart.  I printed out a bunch of them, added some washi tape, punch the holes and started filling them in.


The rest of the items I already had in my swatch book were for people coloring - eyes, skin, hair combos.  I kept these same pages, adding a strip of washi to each one, then adding them to my book.

Free blank eye chart can be found here

I have my book organized into four sections (using the included covers as divider pages :))-
1.  color chart and tools.  I have some transparent light source guides that I put in a zipper pocket.

Free downloads of the guides can be found here
2.  the color combo charts.

3.  the eye, hair, and skin combo charts.

4.  I left some of the lined paper that came with the notebook to make notes and scribble drawings as needed.

To finish the whole thing off, I needed a cover!  I had purchased the Copica image from Saturated Canary when it first came out and kind of forgot about her.... until I was sifting through digi stamps to find one for my cover!!  I resized her to take up most of the page and added some outlined letters.  And then the fun began..... COLORING!!  I'm in love with this color combo that I ended up using on her.  Here's the full cover:


And here's a close up of Copica:


So now I'm happy with my swatch book and I have no excuse to not keep it current!

This weeks challenge at MarkerPop is Anything Goes so I'm playing along with the challenge:


Thanks for stopping by,

Angie


Friday, April 18, 2014

Bright Airbrushing

I feel like my Copics have been neglected lately so I decided that I wanted to do something with them, but didn't have the patience to sit and color.  I pulled out the airbrush and just started in.

I picked out the eight fluorescent markers and layer down an air brush based with one of the lighter shades.  Then I grabbed some stencils and just started airbrushing away.  Here's what I ended up with:


Now when I started the airbrushing I had an idea in mind to do a little masking and use black gesso.  So I just kept airbrushing until I was happy with the background.  I cut out the work 'love' from some masking paper on my Silhouette and put that on the pages.  I added some wash tape on the top and bottom of the page and the covered it all in black gesso.  When I removed the masking paper and wash tape, I added a little white paint pen and some scallops with a brush marker to end up with my final page:


Good to feel like I finally got some crafting in!

This is for the challenge over at MarkerPop this week as well.


Thanks for stopping by!

Angie

SUPPLIIES:
COPICS - FRV1. FYR1, FYG1, FY1, FV2, FYG2, FBG2, FB2, Brush Multiliner
MASKS - Tim Holtz Measure, Burlap, Shattered; Dot stencil
Silhoutte (Cafe Rojo Font)
White paint pen
Masking Paper
Black Gesso
Paint Brush

Saturday, March 22, 2014

Purple Bunny Shaped Card

I'm working on some cards for Farmhouse Memories this weekend.  Here's one of my favorites so far...


Not the greatest pic but not too bad for having practically no light ;)  The little image is by Wild Rose Studio and actually says Happy Birthday with a little mouse in the tree.  I masked that part of the stamp when I stamped it so I could use it for a different card.  The ribbon was colored using the darkest copic marker that I used on the purple in the image.  It's cute... I may not be able to part with it!

For the inside, I stamped a border that coordinates with the dies (like I did on the front of the card) and added a sentiment sticker from SRM.


Thanks for stopping by!

Angie

SUPPLIES - 

COPICS: G21, G24, G28, E29, E39, E71, E74, E77, R20, R21, W0, W2, 0, YG03, YG61, YG63, YG67, V12, V15, V17, FRV1
Masking Paper
Spellbinders Classic Ovals Large
Just Right Nested Clouds and Tags Dies
Distress Inks - Broken China and Dusty Concord
Inky Antics Cloud Stencil
White Seam Binding Ribbon
SRM Wishing You Well Sentiment Stickers
Foam Tap

Friday, March 14, 2014

Rainbow Art Journal Page

I've been working on an art journal page and (as always) seemed to take longer than I had anticipated!  I saw this quote that I liked on Goodreads awhile back and had an idea this week of turning it into a journal page.  And said it was rainbow/gold related it was perfect to usher in the spring AND St. Patrick's day.

I started by covering my pages in torn phone book pieces and covering them with a thin coat of gesso.


Next I added some a thin coat of blue paint.


While that was drying, I pulled out my gelli plate and made some rainbow sheets on deli paper.  I kept it really simple by just mixing the color with some gold paint.


I added a little stamping to my blue pages (not much since I knew a lot of it would be getting covered up anyway), colored my image, and prepared my rainbow.


Once I got everything painted, stamped, colored, and cut, I started putting it all together and here is my final page:


It's a little hard to see in the photo, but the quote says, 'Dare to love yourself like a rainbow with gold at both ends.'  Very fitting for spring and St. Patty's!

Here's a close up of my coloring.  I took a Halloween/witch stamp and turned it into a little leprechaun dress for her.


I'm linking up with the following challenges this week:


Thanks for stopping by!

~Angie

SUPPLIES:
COPICS - Skin - E000, E00, E01, E11, E13; Hair - E97, E99, E29; Shoes - C5, C7, 100; Eyes - G46, G43, G21; Dress - G20, G21, G24, G28
PAINT - Liquitex Basic Acrylics in Light Blue, Primary Blue, Brilliant Yellow Green, Phthalocyanine, Cadmium Red Deep Hue, Cadmium Orange deep hue, Cadmium Yellow Medium Hue, Hooker's Green Hue Permanent, Cerulean Blue Hue, Deep Violet, and Gold
MISC - Ahni and Zoe gold marker, deli paper, phone book, paintbrushes