Sunday, December 29, 2013

A little art journaling to end the year

I'm not sure how I managed, but I got not one, but TWO art journal pages done this weekend... I was on a roll! :)

The first one I kept pretty simple - black gesso, three stamp sets, some versamark ink, scraps of black paper and some pearl ex powders.


I love how shimmery the powders are.  This close up can't do them justice!


Since it's pretty shimmery, I'm throwing in to the Simon Says Stamp Wednesday Challenge - Bling it On.

The next page I got done has a little more to it, but I kind of love how it turned out :)


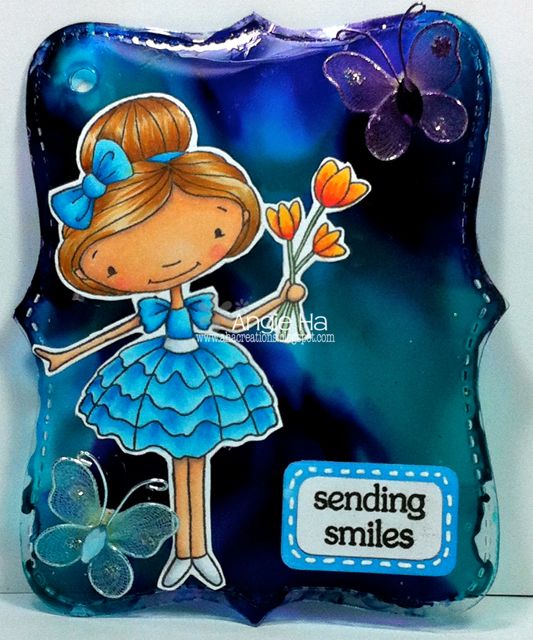
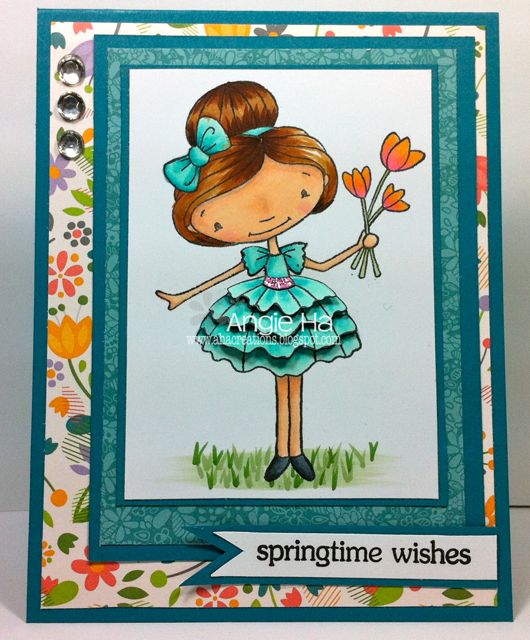
I used a piece of tissue paper that I got and thought it was cute so I held on to it (it was probably something that was used to wrap something I purchased, but I've had it for a while now, so who knows!)  I added a light layer of gray paint over it.  Then masked off the third quarter and painted that piece teal.  I added a little dimension with some croco in bronze and a chevron stencil.


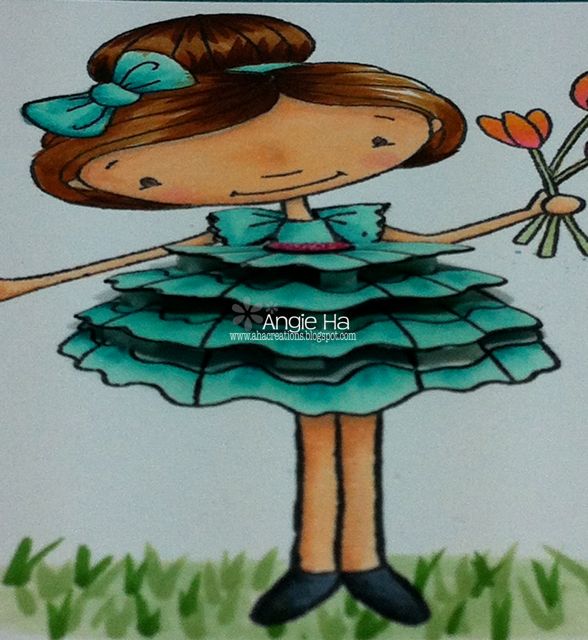
The girls are the Prima doll stamp that I stamped four times and colored with my Copics.  Their dresses are pieces from some 6x6 paper pads I have in my stash.  I finished it all off with some Pitt Brush Pens and the glittery stickers for the saying.

I'm feeling quite accomplished this weekend.  Now if only I could direct some of that energy towards house hold chores ;)

Thanks for stopping by!

Angie

Friday, December 13, 2013

Christmas Tags

I just wanted to pop in and share some tags I've been working on...

Sorry the lighting isn't the greatest on these!

I stamped the images on some watercolor paper and heat embossed them.  Then I used my Distress Markers to watercolor with.  Simple enough to do a batch and not wonder why I put myself up to it!


And since they're for the holidays and I used some markers, I'm entering in MarkerPop Challenge #36...

Thanks for stopping by,

Angie

SUPPLIES
PAPER - Distress Watercolor Paper, Recollections City Sidewalks
STAMPS = Cosmo Cricket Jolly Days
MARKERS - Distress Markers: Barn Door, Mowed Lawn, Squeezed Lemonade, Weathered Wood, Antique Linen, Gathered Twigs, and Ripe Persimmon
OTHER - Paper Smooches Hexalong dies; Xmas Red, Crystal, and Green Stickles; Stampin' Up! Real Red Ribbon, Queen & Co Twine, foam tape


Friday, December 6, 2013

Christmas Sprite

It's been weeks!  Holiday time seems to go by much quicker than regular time ;)

I wanted to play along with the Some Odd Girl challenge this month.  It's been ages and I was dying to break out an image and get to coloring.  I adore the Spunky Sprite digi image and thought she'd work great on a Christmas card.


The SOG challenge this month was to make your own background.  I tried a couple ideas I had floating in my head but wasn't having any luck.  I ended up finding a snowflake background stamp and embossing it with some glittery powder.  The image was colored with Copics.  The gifts were paper pieced and stacked to make her seat.

I traced her wings onto vellum and covered the vellum with a clear Wink of Stella pen.  The pen caused the vellum to curl a little adding some great sparkly dimension.


To finish off the card, I did a little decorating on the inside:


Thanks for stopping by,
Angie

SUPPLIES
STAMPS - Some Odd Girl Spunky Sprite (digi) and Warm Wishes Tia (clear); Paper Smooches Christmas Sampler; Impression Obsession Snowflakes
PAPER - Stampin' Up! Crumb Cake and Real Red, Recollections Christmas City Sidewalks, Copic Xpress it
INK - Memento Tuxedo Black, Versamark
COPICS - Skin: YR0000, YR000, YR00, E11, E04, E08; Hair: YR24, YR27, E35, E37; Clothes: R21, R24, R29, R59, V99, G03, G05, G19, G28; Eyes G43, G21, G46
OTHER - Brads and Pearl from my stash, Stampin' Up Dazzling Ice Embossing Powder, White Embossing Powder, Vellum, Wink of Stella Clear Glitter Pen, Foam Dots


Saturday, November 9, 2013

Too early for a Christmas card?

So I thought I was back after my hiatus and someone (eh hem, mom!) kept me busy pretty much every weekend in October - productive and busy weekends.  By the time I got home, I had no motivation to get anything posted here.  But I think I'm really back this time ;)

I taught a little class at a local store today (Farmhouse Memories), and I had some extra images that I colored so decided to create something new with it.  For the class, I came up with this card (sorry the pics so dark):

I didn't want to do too much fussy cutting for a class, but that adorable image was just something I was dying to fussy cut.  When I got home, I dug out some supplies and got to work.  I used some of the same elements from the first card, but altered it just slightly to create my new card:


She's just as beautiful as I thought she would be all cut out :D  And what's a fairy without some sparkle?  I finished her off by brushing her wings with some Wink of Stella.... sparkly!!


And since I finally broke out my Copics, I'm playing along with MarkerPop's bi-weekly challenge (it's been too long!).

Thanks for stopping by!

~Angie

SUPPLIES:
PAPER - Green and red card stock; Copic Xpress-it Blending Card
STAMPS - Penny Black Fairy Holly and Hero Arts the Miracle of Christmas
INK - Memento Tuxedo Black and Versafine Onyx Black
COPICs - Hair: YR21, E35, E37, E29; Skin: E000, E01, E02, E11, E04, E08; Holly: YG61, G24, YG63, YG67; Clothes: R21, R24, R29, R59, V99, 0, C0, C1, C3; Bells: Y13, Y15, Y18, Y35; Globe - BG000, 0
OTHER - Snowflake Mini 8 Punch, Wink of Stella Pen (clear), Fouland Cuttlebug embossing folder


Friday, October 18, 2013

Enchanted Elves

When I saw the Enchanted Elves set from Paper Smooches, it was one of those most of stamp sets.  I love the characters in that set so as soon as it arrived this week, I stamped it out and colored each of the little guys (I know I just posted a Halloween card, but I couldn't resist!).  I opted for colored pencils this time around and I'm pretty happy with the results.  Once the three were colored, I stared fussing around with a card front.  I had an idea for an elf peeking out the window to see Rudolph so started digging around in my stash for supplies and here is what I came up with:


Love it! :D  Except you'll notice only two of my colored images made it to the card.  I really wanted to use the third on this too, but couldn't fit him in.  When I added some fun to the inside, I tried to use him but just didn't like how he was ending up.  But I had to use him some how so I simplified the image for the inside...


Since I couldn't use my colored elf on the card, I grabbed a tag ;)


I'm linking this up with:

as well as throwing it in for the Paper Smooches Guest Designer Search.

Thanks for stopping by!!

~Angie

SUPPLIES
PAPER - Stampin' Up Crumb Cake; Bella Blvd Christmas Countdown Collection; Neenah Solar White; Watercolor Paper; Ranger Manilla Tag
INK - Memento Tuxedo Black; Versifine Onyx Black; Versamark; Distress Ink - Gathered Twigs and Festive Berries
STAMPS - Paper Smooches Enchanted Elves, Merry Motifs; Stampin' Up Woodgrain; Hero Arts Miracle of the Holiday
DIES - Paper Smooches Duo Die 1, Christmas Words, Elf Icons and Motifs Icons
OTHER - Prismacolor pencils, Dazzles Jeweled Stickers, Glossy Accents, Ranger Sticky Embossing Powder, White Embossing Powder, Red Glitter, Dylusion Inks


Monday, October 14, 2013

I'm back...

Finally!!  My break from creating lasted a little longer than I anticipated but I'm finally starting to get back into it!  We moved back in June so all of my stuff started getting packed in mid-May.  Mid-October now and I think it's almost all unpacked... my crafty goods at least ;)

I'm still working on some other things around the house (once I get this wall paper all down, I never want to see another inch again!!), so I'm starting with a simple card.  This was super quick and easy for me to create and just in time for Halloween:


I used Black Pearl cardstock for the base and matted a simple pice of white on top of that.  On the white paper, I added two strips of washi tape that I picked up from Michael's and stamped a sentiment from Stamping Bella right above that.  I finished it off by punching three bats using a Martha Stewart punch and coated them with a Wink of Stella Clear Glitter brush for some extra shine.  It's kind of subtle since the black cardstock was already kind of shimmery, but you can see how much they shine below.


So that's it for now... a super simple and fun Halloween card.

Thanks for stopping by.

--Angie

Tuesday, May 21, 2013

Be back soon...

I'm talking a little break from the blog.  We're in the process of packing everything up and moving to a new home.  So between all of the work in the near future and all of my crafty goodness being packed up, I won't have any fun projects to share.  As soon as I get unpacked though, I'll be back!

If you subscribe to my blog (either with Google connect or email) on the left side of the screen, you won't miss when I get back. ;)

Have a great summer!!
Angie

Saturday, April 27, 2013

Spunky Sprite Says Hi!

Hi everyone!  I'm just popping in with a super quick post with a card for the April sketch challenge at Some Odd Girl.  Here's the sketch:


Here's my take on it:


And here's a little closeup on the adorable Spunky Sprite with her pearly wings...


Thanks for stopping by!

Angie

SUPPLIES:
STAMPS - Some Odd Girl Spunky Sprite and Hi! Digis (all cut with my Silhouette Cameo)
PAPER - Basic Grey Serenade
COPICS - Skin: E00, E01, E11, E13; Hair: E50, E53, E55, YR14; Dress/Headband: BG72, BG75, BG78, Y11, Y13; EYES: E53, E55, E57; Hi: E51, E53, E55, E57
OTHER - Moonlight Smooch, Vintage Photo Distress Ink, Sponge Dauber, Tim Holz's minature paper clip, EK Success Postage Stamp border punch, Kiwi Lane Adorn Templates

Tuesday, April 23, 2013

MarkerPop Guest design

Today is my last post as the Guest Designer for MarkerPop.  Here's a sneak of what's up on their blog... go have a look here :)

--Angie

Saturday, April 13, 2013

Let's Bond

When Paper Smooches came out with the Great Chemistry set, I knew I had to have it! (Must be the science geek in me ;)), so I pulled it out today and used it to make a card for this week's Paper Smooches Sparks Challenge.  The challenge this week is this sketch:

When I saw the sketch, I immediately thought about making a gatefold card, so here's how it turned out:


I had to use a little clip to keep it shut for the pic.  I recycled some packaging from Paper Smooches dies for the hexagon and striped border.  On the hexagon, I clear embossed the flasks from the set.  Colored up the scientist and adhered them with foam tape.  Under the fold, I stamped the sentiment and the hexagons from Geo-Graphics.  I selectively colored in some of the hexagons for to add a little more color.  And I finished it all by rounding the top corners.  

And once it's open there's another one of the sentiments stamped on the inside.


Thanks for stopping by,

Angie

SUPPLIES:
STAMPS - Paper Smooches Great Chemistry and Geo-Graphic
INK - Memento Tuxedo Black and Versafine Onyx Black
PAPER - Neenah Solar White, Packaging from Paper Smooches dies
COPICS - skin E50, E51, E53, E55; hair Y11, Y13, Y15, Y35; flask R22, R24, R29, BG0000, BG10; clothes C0, C1, C3, C5, C7, C9, 100, B23, B24, B26
OTHER - Glossy Accents, 1/4" Corner Chomper, Foam Dots, Paper Smooches Hexalongs dies, Distress Markers - Mustard Seed, Barn Door, and Faded Jeans


Sunday, April 7, 2013

Springtime Wishes for MarkerPop


Guess what!! I'm guest designing for MarkerPop for the month of April :)  First post is today (actually yesterday since I forgot to hit publish!) and the next will follow in two weeks.  If you've never heard of MarkerPop, I highly encourage you to visit their store.  In addition to the variety of markers they carry, they have so many great stamps and supplies for your projects!

I picked out two stamps to use as guest designer and the first one I decided to use is the  Springtime Garden stamp from My Favorite Things, I  knew I had to color her up to usher in the spring weather - which can't get here soon enough!  I stamped her out a few times and got to coloring.  I did up a few different versions, so I have TWO projects to share with you today.

The first project is a little tag:
MFT Springtime Wishes tag

I found the clear acrylic tag in my stash and splashed on some Copic Various Ink in BG49, B02, and V09.  The butterflies were also found in my stash and I airbrushed them with the same colors.

For project number two, I stuck with a card:
Springtime Wishes card

When I colored her up, I knew I had to pair her with Lawn Fawn's Bright Side Paper. And I couldn't just color her skirt, I had to do a little layering ;)  I love how it adds a little more natural shadow with just a little foam adhesive!
Layered Springtime Wishes
sorry this one's a little dark, but look at the dimension!
Instead of fussy cutting the image for the card, I decided to keep it a rectangle to be layered on the card so I knew I had to ground her somehow.  Usually, I stick with Cs to ground, but she had to be standing in grass.
I hope you enjoyed my projects today, go visit the MarkerPop Store and see all that they have!  Check out the MarkerPop Blog as well.  During the week they have lots more inspiration to share with you.  

Thanks for stopping by,

Angie

SUPPLIES:
TAG -
Copics - Skin: E00, E01, E11, E13, BV20, R22; Hair: YR27, E53, E55, E57; Clothes: B01, B02, B04, B06, C1, C3, 0; Flowers: Y35, R35, G19, G21; Tag Background: BG49, B02, V09; Airbrushed Butterflies: V09, B02
CARD -
Paper: Lawn Fawn Bright Side Pettite Paper Pad; Stampin' Up! Island Indigo
Copics - Skin: E00, E01, E11, E13, BV20, R20; Hair: E35, E37, E39, E29; Clothes: BG10, BG11, BG13, BG15, RV13, RV34, C5,C7, C9, C10; Flowers: YR12, RV13, YG61, YG67; Grass: YG61, YG63, YG67

Monday, April 1, 2013

Happy Birthday, Grandma!

So I made a quick card for my Grandmother's bday and got it in the mail hoping it would reach her today.  Then I learned yesterday that she's in town, so she won't be getting my card for some time.  So instead, she'll get a preview here :)


Pretty simple one this time around...I wanted to play with some embossing powders.

And I used the color palette from ColourQ #182:


Thanks for stoping by!

Angie

SUPPLIES - 
STAMPS: Simon Says Stamp's Banner Sayings, Impression Obsession's Wavy Lines
INK: Versamark; Stampin' Up! Pool Party, Wisteria Wonder, and Gumball Green
PAPER: Stampin' Up! Pool Party, Wisteria Wonder, and Gumball Green; Neenah Solar White
OTHER: Zing embossing party in Leaf and Powder, KaiserCraft Rhinestones

Friday, March 29, 2013

Free Your Dreams

I got messy today with some paint and, boy was it fun :)  Here's the art journal page I came up with:


I guess I was feeling pretty butterfly-y today as well.  So I found a great quote - 'Free your dreams and take flight - that I thought would go well with it.  The pages are covered with some 7Gypsies tissue paper and sealed with a matte medium.  Then I added some watered down acrylic paints.  Added some Tim Holtz butterfly stamps, some painted sencils.  The butterfly on the right page is a Martha Stewart stamp black embossed on watercolor paper then colored with Distress Markers.  I added some of the purple acrylic paint to an embossing past for the flight pattern.


For the quote, on the left page, I painted in two different butterfly stencils and wrote in the saying.  I started with a white gel pen, but couldn't get a good ink flow, so ended up tracing the letters with some white enamel accents.  

Any crafty plans for this weekend??

Thanks for stopping by,

Angie


Sunday, March 24, 2013

Watercolored Mae

Today, I put away the Copics and pulled out my new Distress Markers to play along with some challenges.  I'm really liking the new markers ;)  Here's my card:


And a close-up of the watercoloring:

It's really hard to see in the pics, but I added some glitter to the yellow with a Spica pen for a littler shimmer.

This card is for:
Some Odd Girl March Sketch Challenge
  

Thanks for stopping by!
Angie

SUPPLIES:
STAMPS - Some Odd Girl Thank You Mae
INK - Stazon Jet Black, Versamark, Distress Markers in Tattered Rose, Mustard Seed, Black Soot, Tumbled Glass, and Faded Jeans
PAPER - Fluid Coldpress Watercolor pad, Stampin' Up! Daffodil Delight and Night of Navy, Origami Paper
OTHER - water brush, Spica Buttermilk pen, white embossing powder, light blue ribbon


Sunday, March 10, 2013

Life is a Song

Just popping in to share another art journal page I came up with using one of my favorite Some Odd Girl Digi Stamps, Dancing Mae...


So Mae is colored with Copics and then fussy cut.  I painted the pages with some red and silver glitter acrylic paint, added some music themed tissue tape, spritzed a little red dylusions spray over everything, then added some stamping and white gel pen.  I printed the saying out on my computer then added that to finish it all off.


Thanks for stopping by!

Angie

Friday, March 8, 2013

Safari Smile

My desk was still littered with my Paper Smooches stamps from my last card (which made me the PS Pro Stamper!!) so I decided to use them again to play along with this weeks Paper Smooches Sparks trend watch....

So many of the little critters from the stamps have great smiles, so I cut the word 'SMILE' out of a card base and had some of the smiley creatures popping through the letters.


I LOVE the laughing hippo.  And the toucan is so cheery.  The monkey is adorable - I thought about cutting him down so that he wouldn't stick out past the edge of the card, but realized that he makes the card look like it's saying, 'Smile, I Love You.' so I left him in one piece (so happy I did!).

Once I got all of their placements figured out, I stamped the chevrons onto a piece of cardstock and popped the smile piece on top.  Then finished it off by layering it on a piece of black cardstock.

Thanks for stopping by!

Angie

SUPPLIES:
STAMPS - Papers Smooches Zoo Crew, Flap Happy, My Peeps, Smoocheroos, Geo-Graphic
INK - Memento Tuxedo Black and Stampin' Up! Island Indigo
PAPER - Stampin' Up! Basic Black, Island Indigo, Neenah Solar White, Copic XPress It
COPICS - hippo C3, R20, monkey E39, E53, toucan FYG2, FRV1, FYR1, FY1, FB2, 110, butterfly BV08, BV34, R22
OTHER - Silhouette, foam adhesive


Friday, March 1, 2013

Kiss Me Giraffes

It's been awhile since I've played with my Paper Smooches stamps (especially since I got some new ones for Christmas!) and when I saw this weeks challenge, an idea immediately popped in my mind.  This weeks is a Picture Perfect challenge:


Such a cute picture.  So here's what I came up with:


I took the giraffe from Zoo Crew, bent the neck slightly then stamped it.  I tried a reverse stamp for the first time to get the mirrored giraffe on the left.  It took a few tries, but I finally got one that I liked.  I did some really simple copic coloring then popped it on the houndstooth background from Debonair that I white heat embossed then covered with an ombre of Distress Inks.


Thanks for stopping by,

Angie

SUPPLIES - 
STAMPS: Paper Smooches Zoo Crew, Debonair, and A Little Lovin
INK: Memento Tuxedo Black, Versafine Onyx Black, Distress Inks - Spun SUgar, Worn Lipstick, Festive Berries and Aged Mahogany, versamark
PAPER: Stampin' Up! Read Red, Neenah Solar White, Copic Xpress It Blending Card
COPICS: R24 (heart), Y13, Y15, YR14, YR24, YR27, 0.5 multiliner
OTHER: Black Floss, Glossy Accents, Xmas Red Stickles, Heart Punch, Mini Label Punch, 1/16" circle punch, white embossing powder


Sunday, February 24, 2013

You Color My World - layered!

Last week I shared a journal page I created using an adorable Tiddly Inks image.  (You can see that here.)  I colored the image again and did some layering with her to make a great card...


I had printed her kind of large so I knew the card would be fairly plain.  To add a little more color to it, I inked a piece of glossy paper with Copic various inks and put that behind the white panel.  I punched a little hole towards the bottom and white embossed the sentiment in the window.  Then to add a little more to fill some of the white space, I added some little mini buttons I had in my stash.


I love how she turned out :)  I'm playing along with MarkerPop#17 this week:


Thanks for stopping by,

Angie

SUPPLIES -
PAPER: Copic Xpress It Blending Card, Neenah Solar White, Glossy cardstock
STAMPS: Tiddly Inks Little Artist Digi, Paper Smooches Word Salad
INK: Versamark, Memento Tuxedo Black
COPICS: Skin - E00, E01, E11, E13, R20, BV20; Hair - E35, E37, E39, E29; Clothes - B93, B95, B97, B99, 0 on scrap of denim, BV01, BV08, BV04, C6, C8, C10, 110; Brush - E71, E74, E77, W5, W6, W7, Spica Silver, R32, R89; Background - BG23, V09, V12
OTHER: Mini Purple Buttons, Stampin' Up! Word Window Punch, white embossing powder, Glossy Accents, Crystal Stickles, foam squares