Showing posts with label markerpop. Show all posts

Saturday, June 13, 2015

Another card.... what?!?!

I have another card to share for MarkerPop's Anything Goes challenge today:


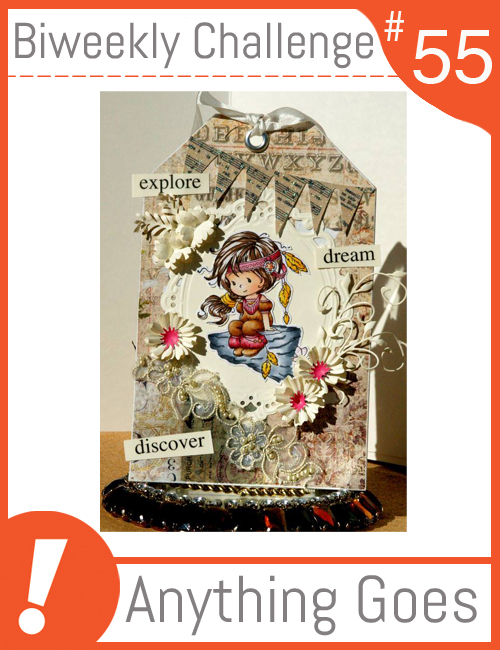
I think this is my go to color combo lately.  Gorjuss doll was stamped multiple times and bits were colored with copics then layered to give her some dimension.  The patterned paper and sentiment are from Lawn Fawn.  The epoxy stars I found in my stash.

Thanks for stopping by!

Angie


Sunday, November 2, 2014

Winter My Whimsical Little World Release

Today I'm sharing some projects for the latest My Whimsical Little World release.

First up, a card I made using the All Dressed Up for Christmas digistamp - I really liked this digi and wanted to keep him a pretty good size, so I opted to color him and just mat him on a couple of Christmas colored papers.


Next, I decided to make a gift tin using the Christmas Owl digi -


I colored parts of this image on 5 different printouts and layered them all together for the final look. Then finished it off with some sequins and rhinestones.


Lastly, I broke out my art journal and whipped up a page using the Love U Latte digi - 


Now hop on over to the other design team members to see what they've come up with using the new release:

And stop by the MWLW Facebook page.  There's a scavenger hunt going on until November 7th for a chance to win a free digi from the shop.

It's also an Anything Goes Challenge at MarkerPop this week, so I'm playing along with their challenge.


Thanks for stopping by.

Angie

Saturday, June 21, 2014

Summer is here

I had only a few things planned for today - do some laundry, pack a trip, and pick up hubby at the airport.  Laundry was a breeze since it's only been me around the house the last week.  Packing got done.  And hubby's  flight has been delayed (possibly until tomorrow!) so I had some time to kill and what better way to do it than, play along again with Markerpop's Biweekly Challenge!


Since it's summer, I thought I'd do something along those lines.  I was looking through my stamps and found this great mermaid from Sweet November stamps and thought she was perfect.  So I inked her up and got to coloring.


Once she was colored and fussy cut, I found some papers, grabbed some distress inks and assembled my card.


Quite summery, don't you think??  And I couldn't let the inside go to waste.  I juster some of the strips I had cut off to make the front and added them to the inside.


Great way to kill some time!  Now what to do ;)

Thanks for stopping by!

Angie


SUPPLIES
COPICS: Skin - E00, E11, E13, E15, R20; Hair - YR21, E97, E99, E18; Fins - BV00, BV11, BV23, BV25; Eyes - BG15, BG57, BG09; Manatee - W3, W5, W7
Stampin' Up! Mini Brads and Fancy Label Punch
Quick Quotes Stowaway 6x6 paper pad
AmyR Summer Sentiments

Tuesday, May 13, 2014

My New Copic Swatch Book

Back in February, I shared my little disc bound coupon book that I came up with.  I really do love these notebooks and I've been frustrated with my Copic swatch book for some time now.  I haven't been creating much lately (wallpaper removal was kicking my butt!!) but I still wanted to color, so I decided it was the perfect time to redo my swatch book.

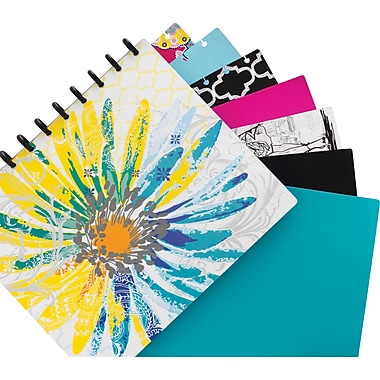
I stopped at Staples to grab some discs to create a new book, but when I got there, I found this notebook with a clear hard cover and interchangeable cover designs.  


Originally, I thought I'd use some decorated chipboard, but this worked even better!  I decided to make my own little cover and display it through the clear plastic.  I wasn't sure what to do with the covers it came with, but figured they'd be usable...eventually ;)

The first thing I did was pull things out of my old book.  I was using a portfolio that I grabbed at Michael's and realized I wasn't really using it since it was a nuisance to pull the pages in and out any time I wanted to add a swatch.  With the disc notebook, the pages are easily accessible and the extra pages easily fold back out of the way.  When I went to add my Copic color chart to the book, I noticed when I would punch the holes it would cut off the top row of colors so I headed back to the Copic website and printed a new one - I adjusted my print settings so there would be a little bit of a margin to allow for the hole punching.


 I added wash tape to the edge to reinforce the hole punching.

I had been using some circles that I printed from my computer for color combos, but wasn't 100% happy with them, so I did a search and found this great combo chart.  I printed out a bunch of them, added some washi tape, punch the holes and started filling them in.


The rest of the items I already had in my swatch book were for people coloring - eyes, skin, hair combos.  I kept these same pages, adding a strip of washi to each one, then adding them to my book.

Free blank eye chart can be found here

I have my book organized into four sections (using the included covers as divider pages :))-
1.  color chart and tools.  I have some transparent light source guides that I put in a zipper pocket.

Free downloads of the guides can be found here
2.  the color combo charts.

3.  the eye, hair, and skin combo charts.

4.  I left some of the lined paper that came with the notebook to make notes and scribble drawings as needed.

To finish the whole thing off, I needed a cover!  I had purchased the Copica image from Saturated Canary when it first came out and kind of forgot about her.... until I was sifting through digi stamps to find one for my cover!!  I resized her to take up most of the page and added some outlined letters.  And then the fun began..... COLORING!!  I'm in love with this color combo that I ended up using on her.  Here's the full cover:


And here's a close up of Copica:


So now I'm happy with my swatch book and I have no excuse to not keep it current!

This weeks challenge at MarkerPop is Anything Goes so I'm playing along with the challenge:


Thanks for stopping by,

Angie


Friday, April 18, 2014

Bright Airbrushing

I feel like my Copics have been neglected lately so I decided that I wanted to do something with them, but didn't have the patience to sit and color.  I pulled out the airbrush and just started in.

I picked out the eight fluorescent markers and layer down an air brush based with one of the lighter shades.  Then I grabbed some stencils and just started airbrushing away.  Here's what I ended up with:


Now when I started the airbrushing I had an idea in mind to do a little masking and use black gesso.  So I just kept airbrushing until I was happy with the background.  I cut out the work 'love' from some masking paper on my Silhouette and put that on the pages.  I added some wash tape on the top and bottom of the page and the covered it all in black gesso.  When I removed the masking paper and wash tape, I added a little white paint pen and some scallops with a brush marker to end up with my final page:


Good to feel like I finally got some crafting in!

This is for the challenge over at MarkerPop this week as well.


Thanks for stopping by!

Angie

SUPPLIIES:
COPICS - FRV1. FYR1, FYG1, FY1, FV2, FYG2, FBG2, FB2, Brush Multiliner
MASKS - Tim Holtz Measure, Burlap, Shattered; Dot stencil
Silhoutte (Cafe Rojo Font)
White paint pen
Masking Paper
Black Gesso
Paint Brush

Friday, March 14, 2014

Rainbow Art Journal Page

I've been working on an art journal page and (as always) seemed to take longer than I had anticipated!  I saw this quote that I liked on Goodreads awhile back and had an idea this week of turning it into a journal page.  And said it was rainbow/gold related it was perfect to usher in the spring AND St. Patrick's day.

I started by covering my pages in torn phone book pieces and covering them with a thin coat of gesso.


Next I added some a thin coat of blue paint.


While that was drying, I pulled out my gelli plate and made some rainbow sheets on deli paper.  I kept it really simple by just mixing the color with some gold paint.


I added a little stamping to my blue pages (not much since I knew a lot of it would be getting covered up anyway), colored my image, and prepared my rainbow.


Once I got everything painted, stamped, colored, and cut, I started putting it all together and here is my final page:


It's a little hard to see in the photo, but the quote says, 'Dare to love yourself like a rainbow with gold at both ends.'  Very fitting for spring and St. Patty's!

Here's a close up of my coloring.  I took a Halloween/witch stamp and turned it into a little leprechaun dress for her.


I'm linking up with the following challenges this week:


Thanks for stopping by!

~Angie

SUPPLIES:
COPICS - Skin - E000, E00, E01, E11, E13; Hair - E97, E99, E29; Shoes - C5, C7, 100; Eyes - G46, G43, G21; Dress - G20, G21, G24, G28
PAINT - Liquitex Basic Acrylics in Light Blue, Primary Blue, Brilliant Yellow Green, Phthalocyanine, Cadmium Red Deep Hue, Cadmium Orange deep hue, Cadmium Yellow Medium Hue, Hooker's Green Hue Permanent, Cerulean Blue Hue, Deep Violet, and Gold
MISC - Ahni and Zoe gold marker, deli paper, phone book, paintbrushes