Saturday, June 21, 2014

Summer is here

I had only a few things planned for today - do some laundry, pack a trip, and pick up hubby at the airport.  Laundry was a breeze since it's only been me around the house the last week.  Packing got done.  And hubby's  flight has been delayed (possibly until tomorrow!) so I had some time to kill and what better way to do it than, play along again with Markerpop's Biweekly Challenge!


Since it's summer, I thought I'd do something along those lines.  I was looking through my stamps and found this great mermaid from Sweet November stamps and thought she was perfect.  So I inked her up and got to coloring.


Once she was colored and fussy cut, I found some papers, grabbed some distress inks and assembled my card.


Quite summery, don't you think??  And I couldn't let the inside go to waste.  I juster some of the strips I had cut off to make the front and added them to the inside.


Great way to kill some time!  Now what to do ;)

Thanks for stopping by!

Angie


SUPPLIES
COPICS: Skin - E00, E11, E13, E15, R20; Hair - YR21, E97, E99, E18; Fins - BV00, BV11, BV23, BV25; Eyes - BG15, BG57, BG09; Manatee - W3, W5, W7
Stampin' Up! Mini Brads and Fancy Label Punch
Quick Quotes Stowaway 6x6 paper pad
AmyR Summer Sentiments

Sunday, June 15, 2014

Glitter, Stencils, and Stickers!

Hello, my name is Angie and I am addicted to outline stickers!  I don't use them as often as I should considering the number of them that I've accumulated.  I recently got a couple sets of stickers that were little garden fairies and rushed home to do something with them.  I decided since they are fairies, coloring them on glitter was the way to go.  I covered some paper with ScorTape, burnished on some glitter, added a few stickers, and got to coloring.


After that, I couldn't decide what to do with them.  So they sat on my desk for a couple of weeks while I figured it out.  Then when I watched on of Darlene's recent videos, I was inspired.  (See her video here.)  I loved the card layout and thought these girls would look great on a hill of their own!


I didn't put any sentiments on so they could be used for whatever.  There was a ton of die cutting involved, some distress inks, colic airbrushing, embossing paste, ad lots of time, but I love this little set of blank cards.

I'm playing along with the following challenges:

Simon Says Stencil It

MarkerPop #45 - Anything Goes

Thanks for stopping by,

Angie

SUPPLIES
120 lb card stock for card base
white card stock
Dreamweaver's white embossing paste
Stampin' Up! Iridescent Ice Embossing Powder
Elizabeth Crafts - Flower Cuties 1 and Flower Cuties 2 outline stickers, Ultra fine glitter
Copics and Airbrush
Sweet and Sassy Cloud dies
Masking Paper
Distress Inks - Mowed Lawn and Peeled Paint
Distress blending tool
Stencil
Spellbinders A2 Curved Borders One

Sunday, June 8, 2014

Honeycomb Hello

I can't believe it, but there is absolutely NO stamping involved in todays card!  So rare when that happens for me :)


I die cut a few sheets of patterned paper from the same die then inlaid them back into place.  Popped up the sentiment from a coordinating embellishment back, and viola!

Thanks for stopping by,

Angie

SUPPLIES:

Tuesday, June 3, 2014

Playing with Prima Dolls

I've used Prima Doll stamps before (see my art journal page here), so when my mom wanted to take a class with them at Joys of Life Scrapbooking, who was I to say no.  :)  We went and made five tags which reminded me of how much I love these stamps.  I picked up a new one and this weekend got to work.  Instead of paper piecing like we did a lot of in the class, I opted to do some water coloring.


I love how she turned out!  Here's a close up:


I'm playing along with the Simon Says Stamp Wednesday Challenge this week.

Thanks for stopping by,

Angie


SUPPLIES:
Stampin' Up! Indigo Island Ruffles Ribbon and Pool Party Seam Binding Ribbon
Canson Watercolor Paper
Peerless Watercolor Basic Pack

Tuesday, May 13, 2014

My New Copic Swatch Book

Back in February, I shared my little disc bound coupon book that I came up with.  I really do love these notebooks and I've been frustrated with my Copic swatch book for some time now.  I haven't been creating much lately (wallpaper removal was kicking my butt!!) but I still wanted to color, so I decided it was the perfect time to redo my swatch book.

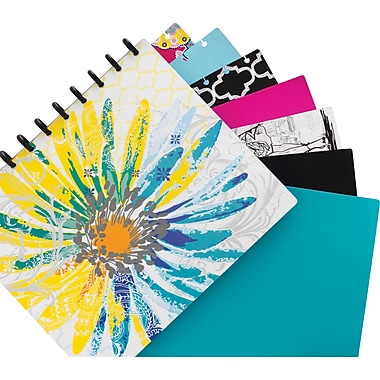
I stopped at Staples to grab some discs to create a new book, but when I got there, I found this notebook with a clear hard cover and interchangeable cover designs.  


Originally, I thought I'd use some decorated chipboard, but this worked even better!  I decided to make my own little cover and display it through the clear plastic.  I wasn't sure what to do with the covers it came with, but figured they'd be usable...eventually ;)

The first thing I did was pull things out of my old book.  I was using a portfolio that I grabbed at Michael's and realized I wasn't really using it since it was a nuisance to pull the pages in and out any time I wanted to add a swatch.  With the disc notebook, the pages are easily accessible and the extra pages easily fold back out of the way.  When I went to add my Copic color chart to the book, I noticed when I would punch the holes it would cut off the top row of colors so I headed back to the Copic website and printed a new one - I adjusted my print settings so there would be a little bit of a margin to allow for the hole punching.


 I added wash tape to the edge to reinforce the hole punching.

I had been using some circles that I printed from my computer for color combos, but wasn't 100% happy with them, so I did a search and found this great combo chart.  I printed out a bunch of them, added some washi tape, punch the holes and started filling them in.


The rest of the items I already had in my swatch book were for people coloring - eyes, skin, hair combos.  I kept these same pages, adding a strip of washi to each one, then adding them to my book.

Free blank eye chart can be found here

I have my book organized into four sections (using the included covers as divider pages :))-
1.  color chart and tools.  I have some transparent light source guides that I put in a zipper pocket.

Free downloads of the guides can be found here
2.  the color combo charts.

3.  the eye, hair, and skin combo charts.

4.  I left some of the lined paper that came with the notebook to make notes and scribble drawings as needed.

To finish the whole thing off, I needed a cover!  I had purchased the Copica image from Saturated Canary when it first came out and kind of forgot about her.... until I was sifting through digi stamps to find one for my cover!!  I resized her to take up most of the page and added some outlined letters.  And then the fun began..... COLORING!!  I'm in love with this color combo that I ended up using on her.  Here's the full cover:


And here's a close up of Copica:


So now I'm happy with my swatch book and I have no excuse to not keep it current!

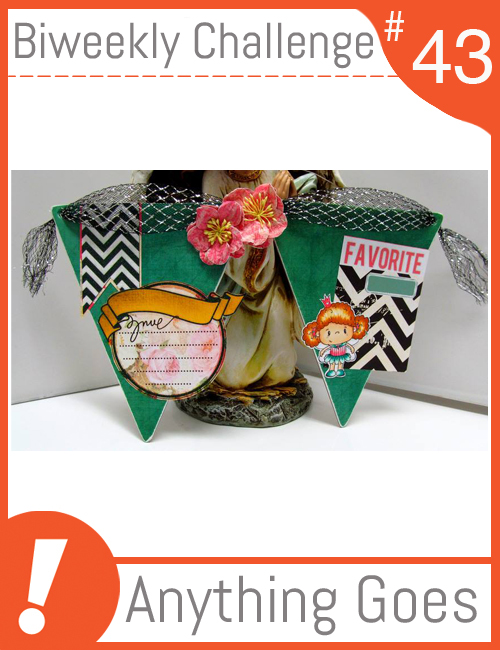
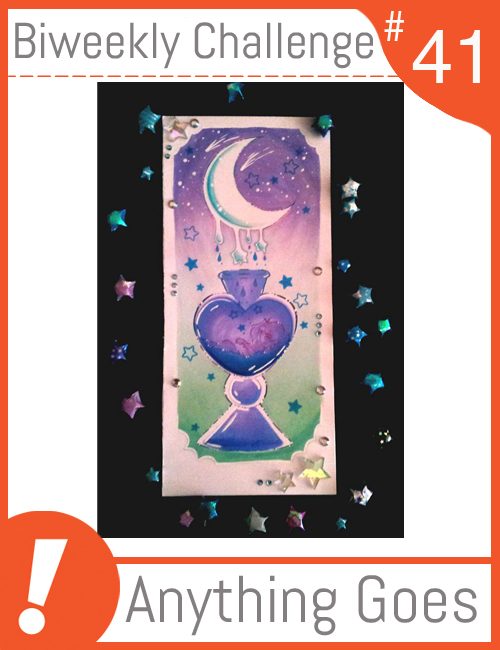
This weeks challenge at MarkerPop is Anything Goes so I'm playing along with the challenge:


Thanks for stopping by,

Angie


Friday, April 18, 2014

Bright Airbrushing

I feel like my Copics have been neglected lately so I decided that I wanted to do something with them, but didn't have the patience to sit and color.  I pulled out the airbrush and just started in.

I picked out the eight fluorescent markers and layer down an air brush based with one of the lighter shades.  Then I grabbed some stencils and just started airbrushing away.  Here's what I ended up with:


Now when I started the airbrushing I had an idea in mind to do a little masking and use black gesso.  So I just kept airbrushing until I was happy with the background.  I cut out the work 'love' from some masking paper on my Silhouette and put that on the pages.  I added some wash tape on the top and bottom of the page and the covered it all in black gesso.  When I removed the masking paper and wash tape, I added a little white paint pen and some scallops with a brush marker to end up with my final page:


Good to feel like I finally got some crafting in!

This is for the challenge over at MarkerPop this week as well.


Thanks for stopping by!

Angie

SUPPLIIES:
COPICS - FRV1. FYR1, FYG1, FY1, FV2, FYG2, FBG2, FB2, Brush Multiliner
MASKS - Tim Holtz Measure, Burlap, Shattered; Dot stencil
Silhoutte (Cafe Rojo Font)
White paint pen
Masking Paper
Black Gesso
Paint Brush

Wednesday, April 16, 2014

Egg monsters!

I've been spending chunks of time working on projects around the house (and avoiding wallpaper that just won't come down!), so my crafting seems to have taken a back seat. Instead of paper crafting I've picked up the crochet hook while watching tv so thought I'd share these little guys.


Love them! Here's the pattern if you want to make some of your own.

Thanks for stopping by!

Angie