Showing posts with label glitter. Show all posts

Sunday, June 29, 2014

More Glitter :D

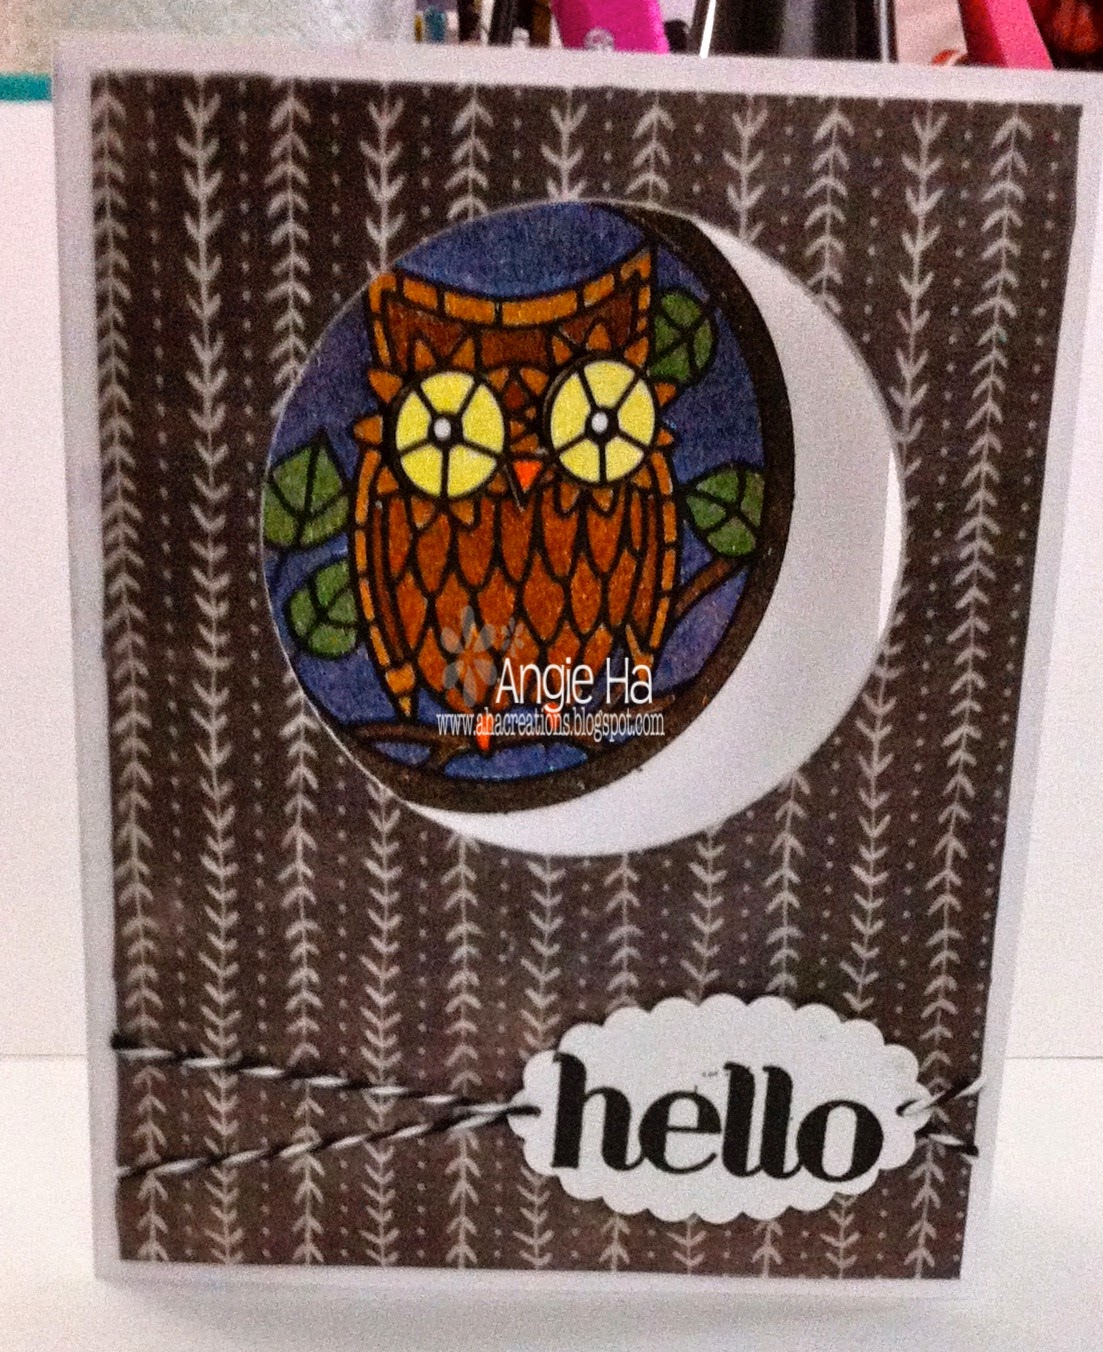
I'm playing with glitter and outline stickers again :)  I got these cute Owl Circle outline stickers and came up with this little card...


I colored with Copics on the glitter and popped it on the inside of the card after creating a window on the front.  The pattern on the from is a washi sheet so it adds a slightly different texture to the front.  Here you can see that the owl is on the inside:


And lastly, a quick close up of the glittery goodness!


Thanks for stopping by!

Angie

SUPPLIES
Elizabeth Crafts Owl Circles
Copics
foam tape
White card stock
Stampin' Up! scalloped circle punch
black and white twine
WeR Memory Keepers Washi sheets
1/16" hole punch
Stampin' Up! Four You


Sunday, June 15, 2014

Glitter, Stencils, and Stickers!

Hello, my name is Angie and I am addicted to outline stickers!  I don't use them as often as I should considering the number of them that I've accumulated.  I recently got a couple sets of stickers that were little garden fairies and rushed home to do something with them.  I decided since they are fairies, coloring them on glitter was the way to go.  I covered some paper with ScorTape, burnished on some glitter, added a few stickers, and got to coloring.


After that, I couldn't decide what to do with them.  So they sat on my desk for a couple of weeks while I figured it out.  Then when I watched on of Darlene's recent videos, I was inspired.  (See her video here.)  I loved the card layout and thought these girls would look great on a hill of their own!


I didn't put any sentiments on so they could be used for whatever.  There was a ton of die cutting involved, some distress inks, colic airbrushing, embossing paste, ad lots of time, but I love this little set of blank cards.

I'm playing along with the following challenges:

Simon Says Stencil It

MarkerPop #45 - Anything Goes

Thanks for stopping by,

Angie

SUPPLIES
120 lb card stock for card base
white card stock
Dreamweaver's white embossing paste
Stampin' Up! Iridescent Ice Embossing Powder
Elizabeth Crafts - Flower Cuties 1 and Flower Cuties 2 outline stickers, Ultra fine glitter
Copics and Airbrush
Sweet and Sassy Cloud dies
Masking Paper
Distress Inks - Mowed Lawn and Peeled Paint
Distress blending tool
Stencil
Spellbinders A2 Curved Borders One

Friday, January 3, 2014

Lucky Stars

I've been working on reorganizing my stamps - the shelves that I had them on didn't hold them all from all of these years of collecting them!  I needed to take a break and remembered these foam stars that I bought over the weekend and thought it would be perfect for a super quick card and a much needed break.

I through some glitter on the entire sheet of foam stars and then picked the ones that I wanted to use.  When I bought them, I already knew which sentiment stamp set I'd be using  so I didn't have to take to long to figure that out.  Here's what I came up with -


Super quick and easy - stamp the sentiment, emboss, place stars around, round a corner.  Done!  It was almost too quick and I had stars left so, what the heck, how about another one ;)


I chose another stamp from the same set and stamped it towards the top, embossed it, added three stripes of scortape, covered them with glitter, placed the stars around, round the corners.  Another quick and simple card!

I used my new 3D foam stars and Lucky Stars stamp set and Simon Says Stamp is have a 'Something New' Challenge... very convenient!

Thanks for stopping by,

Angie

SUPPLIES
PAPER - OFFICE MAX CARDSTOCK
INK - VERSAMARK
STAMPS - LAWN FAWN LUCKY STARS
OTHER - SCRAPBOOK ADHESIVE 3D FOAM STARS, SCORTAPE, MARTHA STEWART LAPIS LAZULI GLITTER, SILVER EMBOSSING POWDER, 1/2" CORNER CHOMPER

Wednesday, September 5, 2012

White Out

I decided to ink up a stamp from The Greeting Farm and play along with the Farm Fresh Friday Challenge this week.  The challenge is to only use white (except for the image which can be colored).  Since I could only use white, I dug out some embossing folders that I liked and some border punches, and then a little glitter, all to end with this little beauty:


When it came to coloring in Beanie Anya, I decided to add in MarkerPop's weekly challenge of yellow.  I didn't want ALL of her clothes to be yellow so I added in some maroon and teal.  I recently started a mini art journal which right now consists of a bunch of pages using mists, distress inks, and stencils/templates.  The very first page in my book (which was probably the last one I worked on!) is one of my favorites and is where my color combo for Anya came from.  I used Aged Mahogany, Peacock Feathers, and Squeezed Lemonade Distress Inks for this page:


And I'll leave you with a close up of the image:


Have a great week!

--Angie

SUPPLIES:
STAMP - The Greeting Farm's Beanie Anya
PAPER - Copic Xpress it Blending CardStock and Office Max White CardStock
INK - Memento Tuxedo Black
COPICS - Hair - E35, E37, E29; Skin - E00, E01, E02, E11, R01; Clothes - Y13, Y15, Y35, Y38, R39, R56, R59, BG10, BG23, BG57, BG49
OTHER - Lifestyle Crafts Embossing Folder, Fiskars Dotted Scallop Punch, Glitter Ritz Warm Highlight Microfine Glitter, Pearls from the stash, Corner Chomper

Tuesday, September 27, 2011

Glitter: Is the Mess Worth it?

I normally avoid loose glitter at all costs.  I don't like finding little flakes of glitter all over the place when I'm done.  But I love how sparkly it is! :-)  For whatever reason, when I decided to join in Some Odd Girl's 12 Weeks of Christmas, I decided to start with glitter!  Who knows what I was thinking, but I think in the end it was worth it.

I started by stamping the cute penguin image from the Warm Wishes Tia set on a sheet of acetate.  Then bit by bit, I put some crystal lacquer down and covered it with glitter.  I continued the process until the entire penguin was covered.


While my glittery penguin was drying, I took some patterened paper and embossed the sentiment with some snowflakes (all from the same set) in white.  To attach the acetate to the paper, I used my Crop-a-dile and a grommet to hold the two together.  The finished tag size is 2-1/2" x 6".

Once the glittering was done, the rest was fairly straight forward.  I do like how the image turned out, but I don't think I'll be playing with glitter again any time soon.

--Angie

SUPPLIES - 

From my stash - pink ribbon, grommet, acetate